The secret to enduring, pain-free kayaking isn’t about arm strength; it’s about transforming your body and boat into a single, integrated engine powered by your core and legs.
- Your arms are connectors, not motors. Power must originate from torso rotation driven by leg and abdominal engagement.
- A death grip on the paddle and poor setup (paddle length, footbraces) directly lead to tendonitis and shoulder impingement.
Recommendation: Deconstruct your current technique and focus on mastering load transfer from your feet to your hands to build a sustainable, powerful stroke.
There’s a familiar, frustrating story among recreational kayakers. You plan an epic day on the water, only to have your trip cut short by a deep, burning ache in your shoulders. Your arms feel like lead, and every stroke becomes a chore. The common advice you’ll hear is to “use your core,” but this simple platitude rarely comes with a practical manual. Many paddlers try to power through, focusing on arm strength, which only accelerates the journey towards chronic pain and potential injury.
The problem is that we instinctively treat paddling as an upper-body activity, like shoveling snow. We use the small, vulnerable muscles of the shoulder girdle to do the work of the body’s largest muscle groups. This approach isn’t just inefficient; it’s a direct path to shoulder impingement, rotator cuff strain, and forearm tendonitis. True paddling endurance has little to do with how strong your arms are and everything to do with technique and structural integration.
But what if the key wasn’t simply to “engage your core,” but to fundamentally remap your body’s entire kinetic chain? The solution lies in understanding that your power doesn’t come from your arms at all. They are merely the final links in a chain of force that begins at your feet, transfers through your legs and hips, and is amplified by the rotation of your torso. Your arms just hold the paddle; your body’s core is the engine.
This guide will deconstruct the paddle stroke from the ground up. We will explore how to generate power from your body’s foundation, how to select and use your gear as an extension of your skeleton, and how to prepare your body to handle the load. By the end, you will have a clear roadmap to transforming your stroke, enabling you to paddle farther, faster, and—most importantly—without pain.
To help you navigate these critical concepts, we’ve broken down the essential components of paddling ergonomics. This structured approach will guide you from the foundational principles of power generation to the specific adjustments and preparations needed for a long, enjoyable day on the water.
Summary: A Paddler’s Guide to Injury-Free Biomechanics
- Why Power Should Come from Abs and Legs, Not Arms
- How to Choose the Right Paddle Length Based on Boat Width
- High Angle vs. Low Angle Blades: Which Suits Your Style?
- The Grip Death: Why Squeezing the Paddle Causes Tendonitis
- Backbands and Footbraces: How to Lock In for Core Transfer
- The Upper Trap Overcompensation: Why Your Shoulders Are Always Raised
- Wide Grip vs. Diamond Grip: Which Targets the Triceps More Effectively?
- How to Plan an Active Vacation That Actually Recharges Your Energy Levels
Why Power Should Come from Abs and Legs, Not Arms
The most fundamental error in paddling technique is treating it as an arm exercise. Your shoulders, biceps, and forearms are relatively small muscle groups not designed for repetitive, high-load endurance tasks. Relying on them is a recipe for rapid fatigue and injury. The real engine for your kayak is your core—the powerful assembly of muscles in your abdomen, back, and hips—connected to your legs. The goal is to master load transfer, moving force efficiently through this robust system.
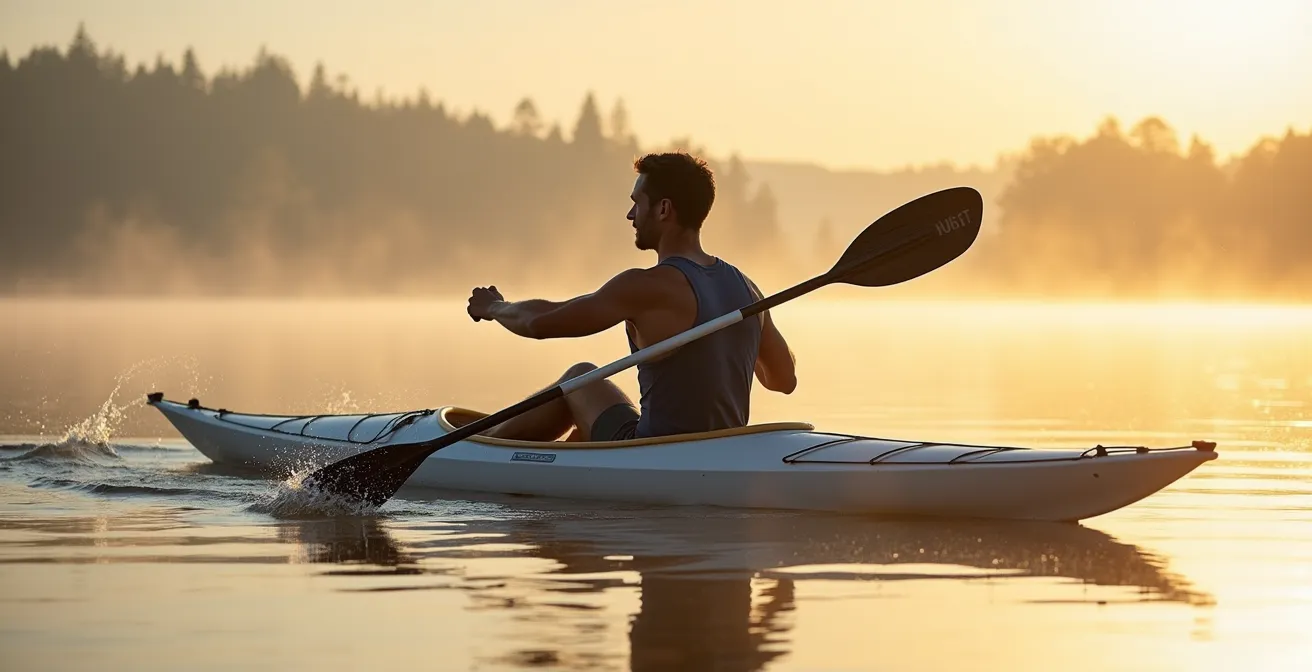
Think of your body as a kinetic chain. The stroke begins with a push from your foot on the footbrace. This leg drive initiates a rotation in your hips, which then turns your entire torso. Your arms, held in a relatively fixed “paddler’s box” frame, simply transmit this powerful rotational energy to the paddle blade. Your lats (latissimus dorsi), the large muscles in your back, are engaged, but your arms and shoulders primarily function as struts in a well-braced machine.
To achieve this, you must consciously shift your focus from pulling with your arms to rotating your body. On every stroke, feel the connection from the ball of your foot pressing against the brace, up through your leg, and into the twist of your waist. Your forward-punching arm extends because your torso is rotating, not because you are reaching. This technique not only protects your shoulders but also unlocks a tremendous source of power and endurance you never knew you had.
By engaging these larger, more fatigue-resistant muscles, you move from a state of muscular exhaustion to one of structural efficiency, allowing you to paddle comfortably for hours instead of minutes.
How to Choose the Right Paddle Length Based on Boat Width
A common mistake is selecting a paddle based solely on a generic sizing chart that only considers your height and the kayak’s width. While boat width is a factor—wider boats require longer paddles to achieve a clean catch—it ignores the most crucial variable: your body’s own geometry. The right paddle length facilitates proper technique and prevents you from over-reaching or contorting your shoulders. An incorrectly sized paddle forces biomechanical compensations that lead directly to strain.
A more reliable method focuses on creating the ideal “paddler’s box,” the optimal geometric frame formed by your arms and chest. The following technique helps you find a personalized fit:
The 90-Degree Elbow Method for Paddle Sizing
As demonstrated by paddling experts, the most effective way to size a paddle is to place the center of the shaft on top of your head. Adjust your hands on the shaft until both of your elbows are at a perfect 90-degree angle. This hand position is your reference point. For a low-angle touring style, your hands should be slightly wider than this reference; for a high-angle, aggressive style, they should be slightly narrower. This method automatically accounts for your unique torso height and arm length, ensuring the paddle fits you, not just your boat.
This proper hand placement ensures you can maintain the paddler’s box without shrugging your shoulders or breaking your wrists. The visual below illustrates this critical sizing posture, which sets the foundation for an efficient and injury-free stroke.
Once you’ve established this correct hand width, the overall paddle length can be fine-tuned. When you stand the paddle on the ground, the top should generally reach somewhere between your chin and forehead. But always start with the 90-degree elbow rule, as it ensures your personal biomechanics are the primary guide for your choice.
Ultimately, the right paddle feels like a natural extension of your body, allowing you to transfer power from your core without straining your joints.
High Angle vs. Low Angle Blades: Which Suits Your Style?
Beyond length, the style of your paddle blade—high angle or low angle—profoundly impacts your body’s ergonomics and energy expenditure. This choice is not about which is “better,” but which is best suited to your paddling goals and physical conditioning. A high-angle style involves a more vertical paddle shaft during the stroke, while a low-angle style keeps the shaft more horizontal, with your top hand staying below shoulder level.
The high-angle stroke is the sprinter’s choice. The blade enters the water closer to the boat, providing a powerful, immediate catch. This technique engages the large lat and serratus anterior muscles for maximum forward propulsion. It’s ideal for bursts of speed, navigating surf, or aggressive paddling, but it comes at a higher metabolic cost and can be more fatiguing over time. In contrast, the low-angle stroke is the marathoner’s friend. It uses a wider, sweeping arc that is less demanding on the major muscle groups, relying more on postural endurance. This is the preferred style for long-distance touring, relaxed cruising, and energy conservation.
Understanding the trade-offs is key to preventing injury. Forcing a high-angle style with a paddle designed for low-angle touring (or vice-versa) creates inefficiency and strain. The following table breaks down the key differences:
| Aspect | High Angle Style | Low Angle Style |
|---|---|---|
| Muscle Groups Targeted | Lats and serratus anterior dominance | Postural endurance muscles |
| Paddle Shaft Position | More vertical (closer to perpendicular) | More horizontal (lower angle) |
| Ideal For | Speed, power, shorter distances | Long-distance touring, energy conservation |
| Fatigue Pattern | Higher intensity, faster fatigue | Lower intensity, sustainable for hours |
| Blade Entry Point | Closer to kayak centerline | Further from kayak, wider arc |
The goal is not just speed, but efficiency. As legendary coach Nigel Foster notes, true mastery lies in maximizing your output while minimizing your effort. He explains:
A more efficient stroke might propel you at the same speed, but it will get you to the beach with less fatigue, muscle strain and joint pain, saving energy for those times when you need to paddle faster or longer.
– Nigel Foster, BCU level 5 coach
Matching your blade and technique to your intended activity is a non-negotiable step toward sustainable, pain-free paddling. For a multi-day trip, a low-angle style is almost always the more ergonomic and sensible choice.
The Grip Death: Why Squeezing the Paddle Causes Tendonitis
One of the most common and insidious habits that leads to injury is the “death grip.” Many paddlers, especially when tired or trying to generate more power, squeeze the paddle shaft with all their might. This simple, unconscious action overloads the small flexor and extensor tendons in your forearm and wrist, leading directly to conditions like lateral epicondylitis (tennis elbow) and medial epicondylitis (golfer’s elbow). It’s a classic case of brute force overriding proper technique.
A tight grip is biomechanically inefficient. It creates unnecessary tension that travels up your arm and into your shoulder, restricting fluid movement and hindering the transfer of power from your core. Your hands should act as hooks, not clamps. The goal is to hold the paddle just firmly enough to control the blade angle. Think of making a loose “O” shape with your thumb and index finger, with your other fingers resting lightly on the shaft. Your “pushing” hand can even open slightly during the stroke, guiding the shaft with the palm rather than gripping it.
This habit is particularly wasteful when you consider how much effort is already lost. According to biomechanical studies of elite paddlers, even the most efficient only utilize about 12% of their total effort output to propel the boat. Squeezing the paddle wastes a huge amount of that precious energy on static muscle contraction that contributes nothing to forward motion. To break the habit, perform a “grip check” every ten strokes, consciously telling your hands to relax. Using a lighter-weight paddle can also help, as it naturally reduces the perceived need to grip tightly.
By learning to relax your grip, you not only prevent tendonitis but also unlock a more fluid, efficient, and powerful stroke that flows from your entire body.
Backbands and Footbraces: How to Lock In for Core Transfer
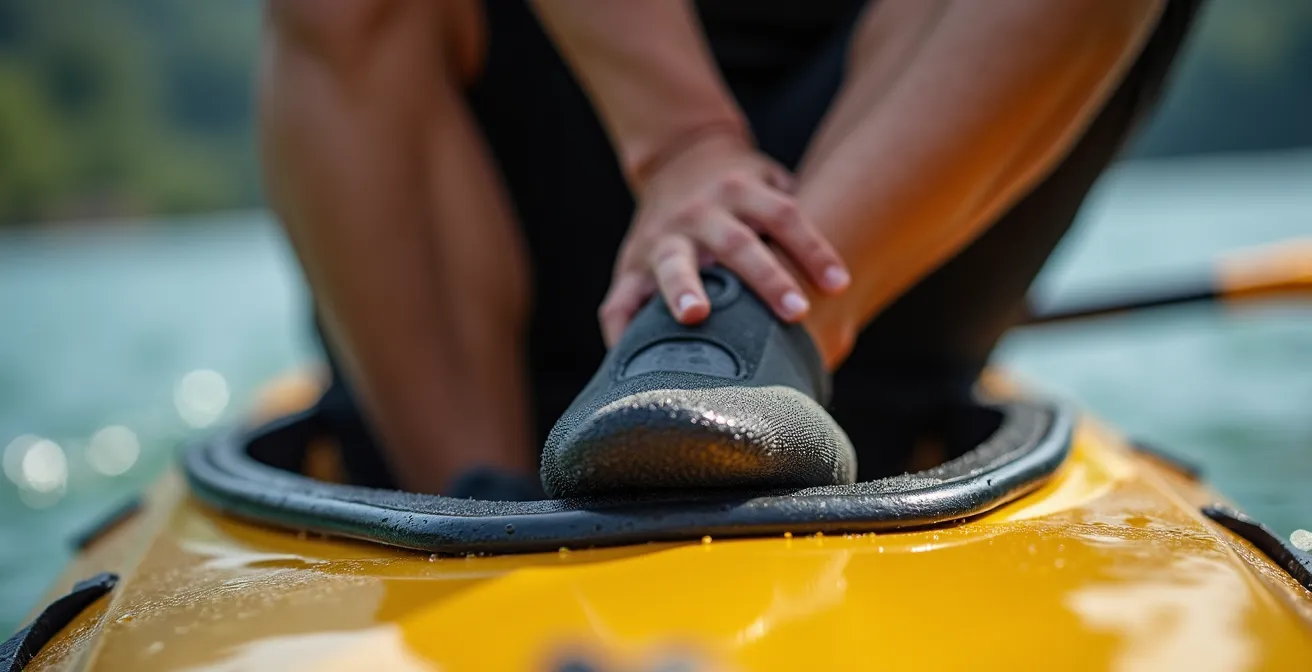
A kayak’s backband and footbraces are not passive comfort features; they are critical components of your boat’s performance system. Proper adjustment and use of these elements create what is known as structural integration, where the paddler and the boat become one cohesive unit. This connection is what makes efficient load transfer from your legs and core possible. Without being properly “locked in,” your body will slide around in the cockpit, and all the force generated by your torso rotation will be lost.
Your footbraces are the starting point of the kinetic chain. They should be adjusted so your knees are bent and can press firmly against the underside of the deck or dedicated thigh braces. This triad of stability—feet on the braces, bottom in the seat, and thighs against the boat—is what anchors your lower body. When you take a stroke on the right side, you should be actively pressing with your right foot. This action engages your core and drives hip rotation. If your footbraces are too far away, your leg drive is impossible, and power generation reverts back to your arms.
Similarly, the backband should be snug against your lower back, supporting your posture and preventing you from slouching. It acts as a backstop, allowing you to push against the footbraces with greater force. It doesn’t need to be painfully tight, but it should provide firm support that encourages an upright, athletic posture. Some advanced paddlers even replace standard sliding pegs with solid footplates to maximize this connection, enabling a surfski-style leg drive where they can actively “pedal” the kayak for maximum power.
Before every trip, take a minute to adjust these contact points. A well-fitted cockpit is the interface between your body’s engine and the water, and it’s a non-negotiable prerequisite for ergonomic paddling.
The Upper Trap Overcompensation: Why Your Shoulders Are Always Raised
Do you finish a paddle feeling a stiff, burning pain in your neck and the tops of your shoulders? This is a classic sign of upper trapezius (or “trap”) overcompensation. Many people, especially those with desk jobs, develop a chronic pattern of elevating their shoulders towards their ears when performing overhead or reaching movements. This habit is then carried directly into kayaking, where the upper traps are recruited to do a job they were never designed for: powering the paddle stroke.
This “shrugging” motion is a direct cause of shoulder impingement. When you raise your shoulders, you decrease the space within the shoulder joint (the subacromial space), which can pinch the rotator cuff tendons and bursa. Doing this repeatedly for thousands of strokes is a surefire way to create inflammation and chronic injury. The correct posture involves actively depressing your shoulders, keeping them low and relaxed. Think of the cue “pull your shoulder blades down into your back pockets.” This engages the lower and mid traps, the proper muscles for stabilizing the scapula.
This is often a deeply ingrained postural habit that needs to be addressed both on and off the water. Strengthening the opposing muscles (antagonists) is crucial. Exercises like dips and push-ups help balance out the chronic pulling pattern of paddling and desk work. As orthopedic specialist Dr. Timothy J. Flock, M.D. advises:
Avoiding completely overhand activities and keeping the front and back rotator cuff muscles maximally strengthened is the key to minimizing rotator cuff problems.
– Dr. Timothy J. Flock, M.D., Orthopedic specialist with 22 years experience
Consciously relaxing your shoulders and strengthening the rotator cuff with simple rubber band exercises should be part of every paddler’s routine. It’s about retraining your body to use the right muscles for the job.
By learning to keep your shoulders down and relaxed, you not only prevent impingement but also allow the larger, more powerful back muscles to take over the work, as they are meant to.
Wide Grip vs. Diamond Grip: Which Targets the Triceps More Effectively?
When discussing muscle engagement, it’s easy to get lost in complex exercises, but in paddling, the goal is efficiency, not isolated muscle targeting. The standard kayaking grip, which is relatively wide (as determined by the 90-degree elbow rule), is designed to primarily engage the large muscles of the back—the lats—and facilitate torso rotation. This is your primary engine. Terms like “diamond grip,” more common in weight training, don’t have a direct, standard equivalent in paddling, but we can use the concept to explore an important biomechanical point.
If we interpret a “diamond grip” as a significantly narrower hand position on the paddle shaft, it would fundamentally change the mechanics of the stroke. A narrower grip would reduce the leverage of the paddle and force the movement to be driven more by the arms and shoulders, specifically increasing the involvement of the triceps on the “pushing” side of the stroke. However, this is precisely the opposite of what an ergonomic technique aims to achieve. Targeting the triceps is not the goal of an efficient forward stroke.
The triceps are engaged during the stroke, but as stabilizers and in the final phase of the push. Their role is secondary. Relying on them as a primary mover would be like trying to power a car with its windshield wiper motor. The wide, standard grip is effective because it creates a powerful lever that your core and back muscles can operate. It allows your arms to function as a rigid frame, transferring force rather than generating it.
Instead of thinking about how to target specific arm muscles, focus on refining the wide-grip technique that allows your body’s largest muscles to do the work. The less you feel it in your arms, the better your technique is becoming.
Key Takeaways
- Your power comes from torso rotation initiated by your legs and core; your arms are just connectors.
- A relaxed grip and proper cockpit setup (footbraces, backband) are non-negotiable for injury prevention and power transfer.
- Your paddle is a lever to be operated by your body’s engine, not a shovel to be muscled through the water with your arms.
How to Plan an Active Vacation That Actually Recharges Your Energy Levels
An ambitious multi-day kayaking trip can be the highlight of a vacation, but it can also be a source of misery if your body isn’t prepared. An active vacation should leave you feeling recharged, not broken. The key is to shift your mindset from simply enduring the activity to actively preparing for it. All the ergonomic principles—core rotation, proper grip, and cockpit integration—are essential, but they are most effective when layered on top of a physically prepared body.
This means starting your “vacation” weeks before you even pack your bags. The repetitive nature of paddling puts specific stress on the shoulder joint, and if your stabilizing muscles are weak from a sedentary lifestyle, injury is almost inevitable. The goal of pre-trip conditioning is to “bulletproof” your shoulders by strengthening the often-neglected rotator cuff and scapular stabilizer muscles. This creates a robust, stable platform for the larger paddling muscles to work from.
This doesn’t require a gym membership or an intense workout regimen. A simple, consistent routine focused on antagonist muscles (those that oppose the primary paddling muscles) and stabilizers can make a world of difference. By building this foundation of strength and stability, you ensure that your body can handle the load of consecutive days of paddling, allowing you to focus on the scenery and the experience, not on your aching shoulders. The following plan provides a structured approach to get you ready.
Your 4-Week Shoulder Bulletproofing Plan
- Weeks 1-2: Build Foundation. Focus on daily rotator cuff external rotation exercises with a light resistance band to activate and strengthen the key stabilizers.
- Weeks 2-3: Add Scapular Strength. Integrate serratus anterior strengthening (like wall slides or push-up plus) to improve scapular control and prevent shrugging.
- Weeks 3-4: Integrate Lower Traps. Add exercises that target the lower trapezius (such as prone Y-raises or face pulls) to counteract upper trap dominance.
- Throughout: Cycle Load and Recovery. As you begin on-water practice, alternate between “load” days (paddling) and “recovery” days (stretching and antagonist work) to prevent overuse.
- Daily Habit: Antagonist Work. As recommended in pre-hab tutorials, schedule brief antagonist exercises like chest stretches and pulling movements after any paddling session or long day at a desk to maintain muscular balance.
By investing a small amount of time in preparation, you transform your active vacation from a physical ordeal into a genuinely restorative and enjoyable adventure.