Knee pain during squats for desk workers is rarely a knee problem—it’s a symptom of hip immobility and muscle imbalances caused by prolonged sitting.
- Chronically tight hip flexors and dormant, weak gluteal muscles are the primary culprits behind poor squat mechanics that overload the knee joint.
- Using tools like box squats and prioritizing the goblet squat allows you to safely rebuild the correct movement pattern from the ground up.
Recommendation: Focus on a systematic approach of hip mobilization and glute activation before attempting to add depth or weight to your squat.
If you have a desk job, you’ve likely felt it: a sharp, nagging pain in your knees the moment you try to perform a deep squat. It’s a frustrating paradox. You’re trying to do something healthy to counteract the effects of sitting, only to be met with pain that sends you right back to the chair. The common advice is often to simply stop squatting deep, strengthen your quads, or focus on not letting your knees travel past your toes. While well-intentioned, this advice misses the anatomical root of the problem.
The issue rarely originates at the knee itself. For the sedentary individual, the source of the dysfunction is almost always located higher up the kinetic chain: in the hips. Hours spent in a seated position create a biomechanical trap. Your hip flexors become short and tight, while your glutes—the powerful engine of your lower body—become inactive and weak, a condition often called “gluteal amnesia.” When you then stand up and ask your body to perform a complex, fundamental movement like a squat, it can’t access the right muscles or ranges of motion. Your body is an expert at compensation; it will find a way to get the job done, but it does so by creating stress in other areas, most notably the lower back and, you guessed it, the knees.
But what if the solution wasn’t to avoid the movement, but to systematically reprogram it? This isn’t about simply stretching more. It’s about understanding the “sedentary cascade” of effects and addressing each one with anatomical precision. This guide will move beyond generic advice and provide a coach’s perspective on dismantling this pattern of dysfunction. We will diagnose the common faults, introduce tools to relearn correct mechanics, and build a foundation of stability that allows you to finally squat deep, strong, and pain-free.
This article will guide you through the key biomechanical challenges and their solutions. By understanding the underlying reasons for your pain, you’ll be equipped with a clear, actionable strategy to reclaim this fundamental movement pattern.
Summary: Your Path to a Pain-Free Deep Squat
- Why Tight Hip Flexors Cause Your Heels to Lift During Squats?
- How to Use a Box to Learn Proper Squat Depth Safely?
- Goblet Squat vs. Back Squat: Which Is Safer for Lower Back Pain?
- The Valgus Collapse: Why Your Knees Caving In Leads to ACL Risks?
- Glute Activation: The Essential Step Before Your First Squat Rep
- Why Running Might Worsen Hip Tightness for Desk Workers?
- Why a Saddle That Is Too High Causes Hip Rocking and Knee Pain?
- Developing Explosive Power for Weekend Warriors to Improve Agility
Why Tight Hip Flexors Cause Your Heels to Lift During Squats?
One of the first signs of dysfunction in a squat is the heels lifting off the floor as you descend. While poor ankle mobility can be a factor, for the desk worker, the primary suspect is often tight hip flexors. When you sit for prolonged periods, the muscles at the front of your hip (like the psoas and iliacus) are held in a shortened position. Over time, they adapt and lose their flexibility. When you then try to squat deep, these tight hip flexors prevent your pelvis from tilting naturally. Your body, in its attempt to find more room to descend, compensates by shifting weight forward onto your toes. This forward shift is what causes your heels to lift, creating an unstable base and placing excessive shearing force on your knees.
To confirm if this is your issue, you can use a simple assessment. The Thomas test is a classic method used in physical therapy to check for hip flexor tightness. As detailed in analyses of squat mechanics, performing this test can reveal if the muscles are restricting your hip extension, which is crucial for a healthy squat pattern. You can find many demonstrations online, but the principle involves lying on your back at the edge of a table, pulling one knee to your chest, and observing if the opposite leg can remain flat. If it lifts, your hip flexors are likely tight.
Addressing this requires more than a few quick stretches. It demands a systematic approach to mobilization and re-patterning. The goal is to restore length to the tight tissues and then immediately integrate that new range of motion into the squat pattern itself. This teaches your nervous system that this new range is safe and usable.
Your 4-Step Hip Mobility Blueprint
- Mobilize: Use tools like a resistance band for banded hip mobilizations. This helps the head of your femur glide correctly within the hip socket, creating space for a deeper squat.
- Foam Roll: Spend at least two minutes daily foam rolling the hip flexors, quadriceps, and the lateral hip (TFL). This helps decrease neural tone and tissue stiffness.
- Stretch: Perform dynamic stretches like the ‘World’s Greatest Stretch’ and static holds like the half-kneeling hip flexor stretch (30-60 seconds per side) to physically lengthen the muscles shortened by sitting.
- Integrate: Immediately practice deep goblet squats, even with light weight. Focus on using your elbows to actively drive your knees out at the bottom, which enhances the hip stretch and reinforces proper mechanics.
This sequence, applied consistently, starts the process of undoing the “sedentary cascade” that leads to poor squat form and knee pain. It treats the source of the problem, not just the symptom of lifting heels.
How to Use a Box to Learn Proper Squat Depth Safely?
Forcing your body into a deep squat when it lacks the mobility or motor control to get there safely is a recipe for injury. A box squat is a phenomenal teaching tool that allows for what we can call “anatomical honesty.” It provides an external target, giving you the confidence to sit back into your hips without fear of falling, which is the cornerstone of a good squat. By starting with a high box and progressively lowering the height, you can gradually earn a greater range of motion while maintaining perfect form. This method ingrains the correct “hip-hinge” pattern first, before challenging depth.
This progressive approach builds both strength and neuromuscular control in a controlled environment. The sequence below demonstrates how the height of the box dictates the depth of the squat, allowing you to master each level before moving to the next.
As you can see, the progression allows you to work on your form at a depth you can currently control. The process is simple but highly effective: start with a box that allows you to squat to just above parallel with a flat back and controlled posture. A 4-week protocol could involve starting high and gradually moving lower. For instance, Week 1 might be 2 sets of 5 reps to a high box, focusing on controlling the descent. By Week 3, you could be doing 5 sets of 1-2 reps to a low box, below parallel, mastering control at your end range. Finally, in Week 4, you remove the box and apply the learned motor pattern to free squats. This progression builds the strength and confidence needed to eventually handle more complex variations like the barbell back squat.
The key is to control the descent and gently touch the box—not crash onto it. Pause for a second on the box, stay tight, and then drive up. This pause helps eliminate the stretch reflex, forcing your muscles to do the work and building true strength out of the bottom position. This is the safest way to teach your body what a deep, stable squat feels like.
Goblet Squat vs. Back Squat: Which Is Safer for Lower Back Pain?
When you’re rebuilding your squat, the variation you choose matters immensely. For anyone with a history of lower back pain or the typical postural issues from a desk job, the goblet squat is unequivocally the safer and more effective starting point compared to the traditional barbell back squat. The reason lies in the placement of the load. Holding a dumbbell or kettlebell in front of your body—the “goblet” position—acts as a counterbalance. This front-loading encourages you to keep your torso upright and engage your core to prevent folding forward. It essentially forces you into a better, safer posture.
In contrast, the barbell back squat places the load directly on top of the spine. For a beginner or someone with a weak core and poor mobility, this can lead to excessive forward lean, which creates significant shear stress on the lumbar spine. Research on spine-friendly squat variations confirms that the goblet squat does not compress the spine in the same way, making it an ideal choice for prehabilitation and for individuals sensitive to spinal loading. The anterior load of the goblet squat naturally promotes a more vertical torso, which is kinder to your lower back.
The following table, based on comparative analyses of the two movements, breaks down the key differences in safety and muscular engagement.
| Factor | Goblet Squat | Back Squat |
|---|---|---|
| Lower Back Load | Places less load on the lower back | Higher load on lower back structures |
| Learning Curve | Easier to learn with weight in front creating correct form | Requires more technical mastery |
| Injury Risk (Beginners) | Lower injury risk for those new to squatting | Higher risk without proper form |
| Core Activation | Higher workload on abdominal muscles due to front loading | Less direct core engagement |
| Muscle Focus | Greater quadriceps emphasis due to front loading | Greater glute focus |
While the back squat is a fantastic exercise for building overall strength and has a greater glute focus, it requires a high degree of technical mastery. For the desk worker looking to build a pain-free foundation, the goblet squat is the superior tool. It not only protects your back but actively teaches you the feeling of a proper squat, making it a powerful corrective exercise in its own right.
The Valgus Collapse: Why Your Knees Caving In Leads to ACL Risks?
Of all the potential form faults in a squat, the most dangerous is arguably the “valgus collapse,” where the knees dive inward during the descent or ascent. This movement is a glaring red flag for underlying weakness and poor motor control, and it places the knee joint, particularly the Anterior Cruciate Ligament (ACL), under tremendous stress. The ACL is a primary stabilizer of the knee, preventing the shin bone from sliding forward and providing rotational stability. When your knees collapse inward, it creates a combination of rotational and side-bending forces that the ACL is not designed to withstand. Over time, this repetitive strain can lead to chronic pain, cartilage damage, and, in a worst-case scenario, a non-contact ACL tear.
This is a particularly critical issue for female athletes. Due to a combination of anatomical factors (like a wider pelvis) and neuromuscular patterns, ACL ruptures occur 3-6 times more frequently in girls and women than in boys and men participating in similar sports. The image below provides a close-up, clinical view of what proper knee alignment should look like versus the dangerous valgus position.

Proper alignment involves the knee tracking directly over the second or third toe. This ensures that the forces of the squat are distributed evenly through the robust structures of the hip, knee, and ankle joints. A valgus collapse indicates that the muscles responsible for holding this alignment—primarily the gluteus medius on the outside of the hip—are not firing correctly. This isn’t a “knee problem”; it’s a hip control problem. The knees are simply caught in the middle. For the desk worker, this is a direct consequence of the “gluteal amnesia” we discussed earlier. Your brain has forgotten how to use these crucial hip-stabilizing muscles, so the adductors (inner thigh muscles) take over and pull the knees inward.
Fixing this is non-negotiable for long-term knee health. It requires a targeted approach to “wake up” the glutes and teach them to do their job of stabilizing the femur (thigh bone) in the hip socket.
Glute Activation: The Essential Step Before Your First Squat Rep
We’ve identified that dormant glutes are a primary cause of valgus collapse and other squatting faults. So, how do we fix it? The answer isn’t just to “do more glute exercises” in your workout. The key is neuromuscular activation performed immediately before you squat. This process is like flipping a switch to “on” for your gluteal muscles, reminding your brain how to use them for stabilization. It’s about establishing a strong mind-muscle connection before you load the movement pattern. Activation drills are not meant to be fatiguing; they are low-intensity exercises focused on feeling the correct muscles contract.
As leading research points out, this preparatory step is profoundly effective. A dedicated protocol focusing on the hip abductors and external rotators can have a massive impact. In fact, one study demonstrated that such a routine can reduce dynamic knee valgus by 53-63% in athletes. This isn’t just about strength; it’s about motor control. As one report in Nature Scientific Reports states, the consequence of ignoring this is clear:
Athletes with poor glutes and hamstring activation are more likely to collapse the knee during a landing, potentially increasing the risk of non-contact ACL injury.
– Nature Scientific Reports, Normative data and correlation between dynamic knee valgus and neuromuscular response study
A simple yet effective pre-squat activation routine might include:
- Banded Lateral Walks: Place a mini-band around your ankles or knees. Take 15-20 slow, controlled steps to one side, then the other. Focus on keeping your toes pointed straight ahead and initiating the movement from your hips, not your feet.
- Monster Walks: With the band in the same position, walk forward and backward in a zig-zag pattern, again focusing on hip-driven movement.
- Glute Bridges: Lie on your back with your knees bent. Place your hands on your glutes and consciously squeeze them to lift your hips. This tactile feedback (palpation) ensures you’re using the right muscles, not your hamstrings or lower back.
- Clamshells: Lie on your side with knees bent and a band around your thighs. Keeping your feet together, lift your top knee, focusing on rotating from the hip.
Performing just a few sets of these drills before you even touch a squat bar can completely change the quality and safety of your movement. It’s the most critical investment you can make for your knee health.
Why Running Might Worsen Hip Tightness for Desk Workers?
Many office workers turn to running as an accessible way to stay active and break the monotony of sitting. While the cardiovascular benefits are undeniable, running can unfortunately feed into the very same pattern of hip dysfunction caused by the desk job. Running is a hip-flexion-dominant activity. With every stride, you’re repeatedly driving your knee forward, shortening your hip flexors. If you finish your run and immediately go back to sitting at a desk or on the couch, those muscles never get a chance to return to a neutral, lengthened state. This creates a vicious cycle: sitting shortens the hip flexors, and then running repeatedly contracts them in that already-shortened state. This can lead to overuse issues like iliopsoas syndrome or “snapping hip syndrome.”
These are not typically acute injuries but rather problems that develop slowly over weeks and months of repetitive strain. You might notice a deep ache in the front of your hip or a “clicking” sound during certain movements. When this kind of stiffness is identified during an assessment, the first line of treatment must be improving the flexibility and mobility of the hip complex. Ignoring it and simply “running through the pain” will only ingrain the dysfunction further and increase the risk of compensatory injuries elsewhere, like the knees or lower back.
To counteract this, a post-run recovery protocol is essential for any desk worker who runs. This shouldn’t be an afterthought but a mandatory part of your routine. The focus should be on movements that reverse the patterns of sitting and running. This includes:
- Half-Kneeling Hip Flexor Stretches: The most direct way to lengthen the muscles you just spent an hour shortening.
- Pigeon Pose Variations: To target the hip external rotators, which also get tight.
- Deep Squat Holds: Simply holding the bottom position of a bodyweight squat for 30-60 seconds is a powerful way to restore natural hip, knee, and ankle mobility.
- Deep Goblet Squats: As mentioned before, using the weight as a counterbalance and actively prying the knees open with the elbows can provide a phenomenal stretch and mobility drill post-run.
By integrating these practices, you can enjoy the benefits of running without letting it exacerbate the postural problems created by your work environment.
Why a Saddle That Is Too High Causes Hip Rocking and Knee Pain?
The “sedentary cascade” doesn’t just affect you during weight-bearing exercises; it can also manifest in other activities like cycling. A common mistake cyclists make is setting their saddle too high, believing it will generate more power. In reality, a saddle that is too high forces you to over-extend your leg at the bottom of the pedal stroke. To reach the pedal, your body has to compensate by dropping one side of your pelvis, creating a “hip rocking” motion that is visible from behind. This pelvic instability is incredibly inefficient and places abnormal stress on your lower back and hip joints.
Furthermore, this compensation has a direct impact on your knee health. The over-extension and pelvic rocking often lead to a toe-down pedaling style, which over-recruits the quadriceps and under-utilizes the powerful glutes and hamstrings. This Quad-dominant pattern, when repeated thousands of times during a ride, reinforces the very muscle imbalances that cause problems in your squat. The constant lateral (side-to-side) stress on the knee from an unstable pelvis can also lead to increased knee pain and stiffness, both on and off the bike.
A proper bike fit is crucial for ensuring that cycling is a complementary, not a detrimental, activity for your squat mechanics. The following table illustrates the cause and effect of improper saddle height.
| Saddle Position | Cycling Pattern | Impact on Squatting |
|---|---|---|
| Too High | Hip rocking, toe-down pedaling | Pelvic instability, quad dominance |
| Optimal Height | Stable pelvis, full pedal stroke | Balanced muscle activation |
| Key Indicator | Lateral knee movement | Increased knee pain and stiffness during squats |
The correct saddle height is typically found when your knee has a slight bend (around 25-35 degrees) at the bottom of the pedal stroke with your foot parallel to the ground. A stable pelvis on the bike translates to a stable pelvis in the squat. Ensuring your equipment is set up to promote good biomechanics is just as important as the exercises you do in the gym.
Key Takeaways
- Knee pain from squatting is often a symptom of hip dysfunction, specifically tight hip flexors and inactive glutes, caused by prolonged sitting.
- Corrective tools like box squats and goblet squats are essential for safely re-learning proper movement patterns before adding significant load or depth.
- Neuromuscular activation of the glutes before squatting is a non-negotiable step to prevent dangerous form faults like valgus knee collapse.
Developing Explosive Power for Weekend Warriors to Improve Agility
Once you have addressed the foundational issues—restoring hip mobility, learning to activate your glutes, and mastering the basic squat pattern—you can then progress to the next level: developing power. For the “weekend warrior,” this isn’t about lifting the heaviest weight possible. It’s about improving agility, reaction time, and the ability to produce force quickly, which translates directly to better performance and reduced injury risk in sports like tennis, basketball, or soccer. The squat is the perfect foundation for building this explosive power.
The key principle here is rate of force development (RFD), or how quickly you can generate force. This is trained by moving a sub-maximal weight as fast as possible. The box squat, our trusted teaching tool, once again becomes invaluable here for dynamic effort work. By training with lighter weights (e.g., 50-65% of your one-rep max) and focusing on accelerating explosively out of the bottom position, you train your nervous system to recruit muscle fibers quickly.
From Rehabilitation to Performance
Top-level coaches often use a “bottom-up” goblet box squat as the very first squat variation for athletes returning from injury. Starting from a seated position on a box forces the athlete to generate pure concentric force without the aid of the stretch reflex. This teaches proper muscle recruitment and stabilization in a non-threatening way. Once this is mastered, they can progress to dynamic effort work, where training fast is essential. As noted by experts like Dr. John Rusin, a typical dynamic effort session might involve 20-30 total reps with short 30-60 second rest periods to maximize power development without causing excessive fatigue.
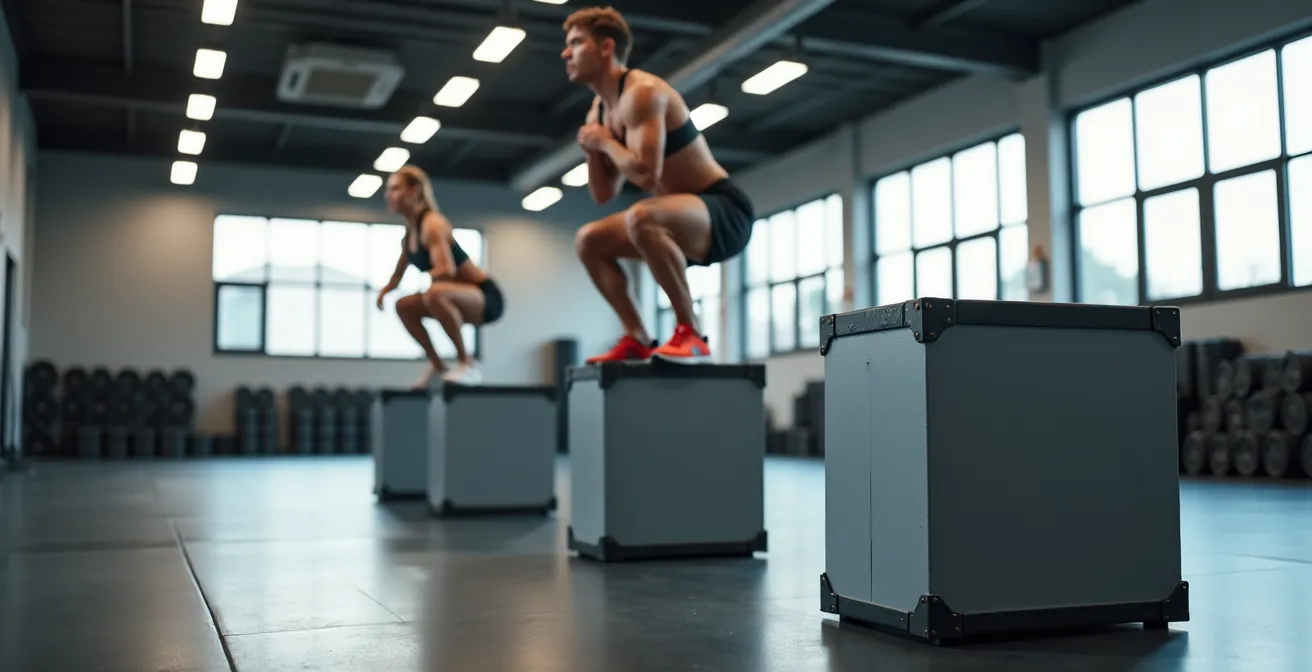
A logical progression from a stable, pain-free bodyweight squat to explosive power could look like this:
- Speed Squats: Use a box and a light weight. Focus on a controlled descent and an absolutely explosive ascent.
- Bodyweight Squat Jumps: Once form is perfect, progress to jumping from the squat position. Focus on a soft landing to absorb impact safely.
- Low Box Jumps: The final step is jumping onto a low, stable box. The goal is a fast, powerful jump and a quiet, controlled landing.
This progression ensures that you are building power on a stable, resilient foundation. You are not just getting stronger; you are becoming a more capable and agile athlete, ready to tackle the dynamic demands of your weekend sport.
Now that you understand the biomechanical chain of events, from the desk chair to the knee pain, the path forward is clear. Start by diligently applying the mobility and activation drills. This is the foundational work that unlocks everything else. Assess your movement honestly, use the tools provided, and earn your progression to build a truly resilient and powerful lower body.