The initial price of sports equipment is misleading; true value is revealed by its Total Cost of Ownership (TCO) over time.
- Cheap gear often has a higher cost-per-use due to rapid performance decay and shorter functional lifespan.
- Technical gear, while more expensive upfront, frequently offers a lower TCO through superior durability, safety, and reduced maintenance needs.
Recommendation: Shift your mindset from purchase price to long-term investment. Prioritize spending on high-contact and safety items where performance decay carries the highest cost.
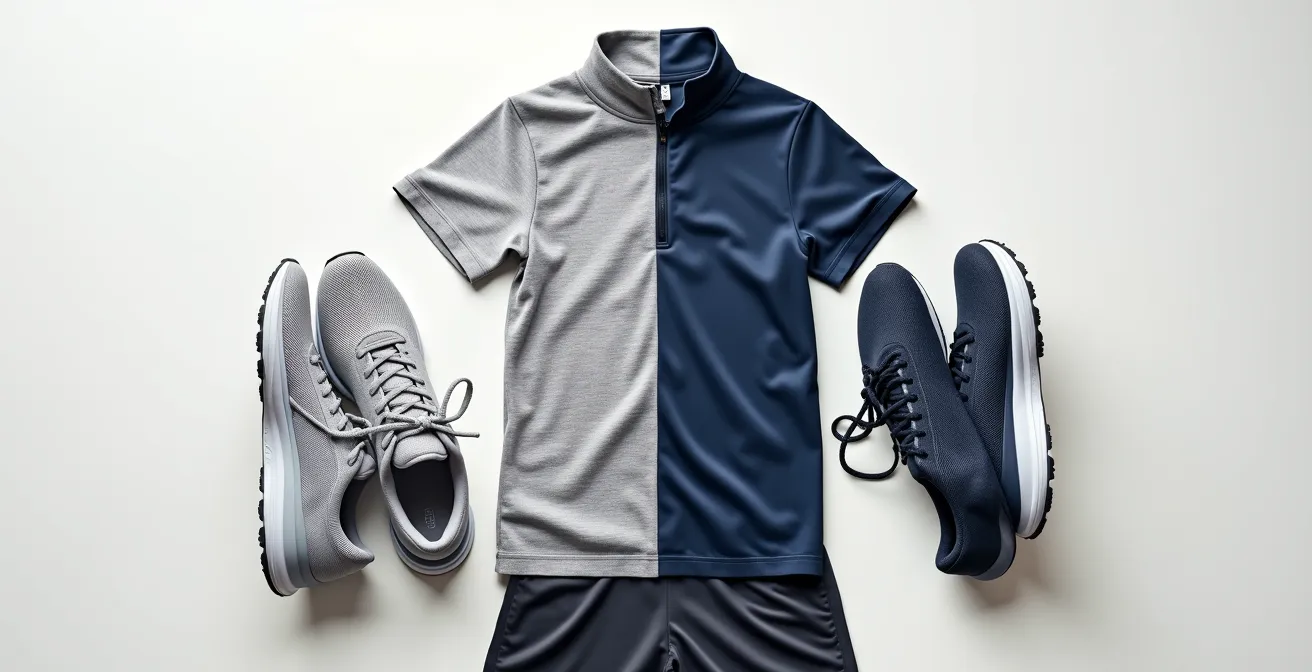
For any budget-conscious athlete, the gear dilemma is constant. Do you invest in the high-performance technical apparel with the intimidating price tag, or stick with the affordable, entry-level option? The conventional wisdom often suggests that beginners don’t need pro-level equipment, which is true to an extent. However, this advice overlooks a critical financial metric that every equipment auditor uses: Total Cost of Ownership (TCO). This isn’t just about the initial purchase; it’s a comprehensive calculation including maintenance, performance, and crucially, the gear’s functional lifespan.
Viewing your gear as a financial asset rather than a simple purchase changes the entire equation. A cheap running shirt that causes chafing and loses its shape after ten washes is not a bargain; it’s a failed asset with a high cost-per-use. Conversely, a technical jacket that maintains its waterproofing for years isn’t an expense; it’s an investment that pays dividends in comfort, safety, and durability. This analysis moves beyond the generic “you get what you pay for” platitude to provide a concrete framework for your decisions.
This article will guide you through an auditor’s evaluation of your sports equipment. We will deconstruct the hidden costs of “cheap” gear, from fabric degradation to safety compromises. We will then establish clear, tangible indicators of quality and provide a strategic model for deciding when and where to invest your budget for the best possible return on investment over a three-year horizon. It’s time to stop spending and start investing.
Summary: Cheap vs. Technical Gear: An Auditor’s 3-Year Cost Analysis
- Why Generic Fabrics Cause Chafing and Overheating on Runs Over 10k?
- How to Identify Reinforced Seams on Technical Apparel Before Buying?
- The Invisible Danger of Using Running Shoes Past 800 Kilometers
- Washing Technical Gear: The 3 Mistakes That Destroy Waterproof Coatings
- When to Upgrade Your Gear: 3 Signs Your Skills Have Outgrown Your Equipment
- Why the $500 Difference in Bikes Only Saves 2 Seconds?
- MIPS vs. Standard Helmets: Is the Extra Cost Worth the Brain Protection?
- Entry-Level vs. Pro Gear: Where Should Amateurs Spend Their Budget?
Why Generic Fabrics Cause Chafing and Overheating on Runs Over 10k?
The first point of failure in cheap sportswear is almost always the fabric itself. Generic materials, particularly cotton or basic polyester, fail to adequately manage moisture. During a run exceeding 10 kilometers, your body produces significant sweat. Cotton acts like a sponge, absorbing this moisture, becoming heavy, and clinging to the skin. This saturation dramatically increases friction, leading to painful chafing. Furthermore, trapped moisture prevents effective evaporative cooling, causing your core body temperature to rise and leading to overheating and premature fatigue.
In contrast, technical fabrics are engineered systems. Materials like polyester-elastane blends are designed with hydrophobic properties. They don’t absorb moisture; they pull it away from your skin and spread it across the fabric’s outer surface to evaporate quickly. This process, known as wicking, keeps you drier, lighter, and cooler. An Australian study of gym pants confirmed that while decent fabric doesn’t have to be excessively expensive, purpose-built blends consistently outperform cotton in moisture management.
From a TCO perspective, the calculation is clear. A cheap cotton shirt may seem economical, but its functional lifespan for serious activity is extremely short. After a few washes, it loses its shape and its performance liability becomes apparent. A study on athletic fabric technology confirms that premium activewear is significantly less likely to fade, stretch, or lose its engineered properties. Therefore, the cost-per-use of a technical garment, which performs its function correctly for years, is often substantially lower than a “bargain” item that fails after a few uses.
How to Identify Reinforced Seams on Technical Apparel Before Buying?
After fabric, the second most common failure point in sportswear is the seams. A garment is only as strong as its weakest link, and on cheap apparel, this is invariably the stitching. Manufacturers cut costs by using overlock seams, which are bulky and create a raised ridge of thread on the inside of the garment. While fast and cheap to produce, these seams are a primary cause of friction and chafing, especially over long distances or during repetitive movements.
High-quality technical apparel, however, invests in advanced seam construction that enhances both comfort and durability. The gold standard is the flatlock seam, where fabric edges are abutted and stitched together, creating a seam that lies completely flat against the skin. This eliminates friction points and is visibly smoother. An even more advanced, and expensive, option is the bonded seam, which uses adhesive to fuse fabric edges together, creating a completely stitch-free, waterproof, and ultra-smooth finish. These construction methods significantly increase the garment’s resilience to stretching and stress, directly extending its functional lifespan.
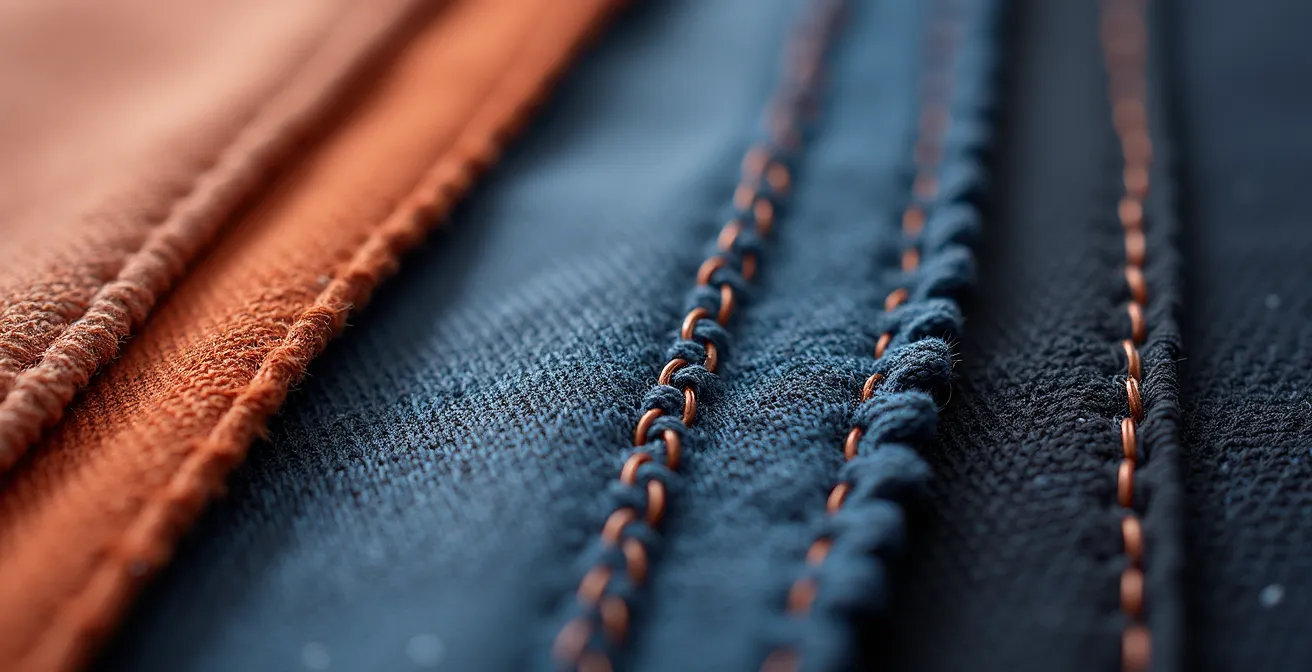
As a gear auditor, you don’t need a microscope to assess seam quality. You can perform a quick tactile and visual inspection in the store to identify durable construction. This simple pre-purchase audit can save you from a poor investment.
Your 3-Point Tactile Test for Seam Quality
- The Stretch Test: Gently pull on the fabric on either side of a seam. In low-quality gear, you might hear threads snapping or see the stitch pattern widen significantly. A quality seam will stretch with the fabric without any signs of strain.
- The Flatness Test: Run your finger over the inside of the seam. An overlock seam will feel like a distinct, rough cord. A flatlock or bonded seam will feel almost as smooth as the fabric itself, a key indicator of superior comfort.
- The Stitch Count Check: Look closely at the stitching. Quality sportswear should have a high stitch density, typically around 12-14 stitches per inch. A lower count indicates a weaker seam that is more likely to fail under stress.
The Invisible Danger of Using Running Shoes Past 800 Kilometers
Nowhere is the concept of performance decay more critical than in running shoes. The primary function of a running shoe isn’t just to cover your foot; it’s to absorb impact through its midsole, typically made of EVA foam. This material is composed of tiny air-filled cells that compress and rebound with each step. However, this ability degrades over time. While a shoe might look fine on the outside, its capacity to cushion impact is a depreciating asset.
Most industry experts suggest a much shorter lifespan than many athletes assume. Based on extensive experience, the Portland Running Company states that most well-made running shoes endure 300-400 miles (480-640 km) of use. Pushing a shoe to 800 kilometers or beyond means you are running on a functionally “dead” midsole. The shoe has become a liability, actively increasing your risk of injury.
This isn’t just theory; it’s a biomechanical reality with quantifiable consequences. The hidden cost of extending a shoe’s life past its functional prime is the potential for stress injuries. As the American College of Sports Medicine notes, the financial trade-off is starkly clear:
A 30% loss in cushioning can increase impact stress on the shins by 20%, a leading cause of shin splints.
– American College of Sports Medicine
From a TCO perspective, a $150 shoe that lasts 600km has a cost-per-kilometer of $0.25. Trying to “save money” by pushing it to 800km doesn’t change this calculation; it simply transfers the cost from your wallet to your body in the form of increased injury risk. The potential medical bills and lost training time far outweigh the “savings” of not buying a new pair. A savvy athlete replaces shoes based on functional mileage, not just visible wear.
Washing Technical Gear: The 3 Mistakes That Destroy Waterproof Coatings
Investing in technical gear with advanced features like a Durable Water Repellent (DWR) coating is only the first step. Protecting that investment through proper maintenance is what truly lowers your TCO. Many athletes unknowingly destroy their expensive gear in the laundry room, drastically shortening its functional lifespan. The three most common and costly mistakes are using the wrong detergent, adding fabric softener, and using high heat.
Regular laundry detergents are designed to break down oils and leave behind hydrophilic (water-attracting) residues. On a DWR-coated jacket, this residue masks the water-repellent finish, causing it to “wet out” or become saturated in the rain. Fabric softeners are even worse; they clog the pores of technical fabrics, destroying both breathability and water repellency in a single wash. Finally, high heat from a dryer can melt the delicate fibers, warp the seams, and permanently damage the DWR coating. According to sports apparel care instructions, items should always be hung to dry or tumbled on a low-heat setting.
The solution is to treat gear maintenance as part of your TCO calculation. Investing in a specialized technical wash preserves the DWR coating. Proper care can even reactivate a fading DWR finish; a 20-minute low-heat tumble dry can often double its effectiveness. The financial difference between proper and improper care is laid bare when comparing detergent costs against garment lifespan.
| Detergent Type | Cost per Load | DWR Impact | Garment Lifespan |
|---|---|---|---|
| Technical Wash | $1.50 | Maintains 100% effectiveness | Extended by 50-100% |
| Regular Detergent | $0.30 | Reduces by 50% per wash | Standard lifespan |
While the per-load cost of a technical wash is higher, it extends the functional life of a $200 jacket by at least 50%, saving you from having to replace it prematurely. This is a clear example of a small, smart investment protecting a much larger one.
When to Upgrade Your Gear: 3 Signs Your Skills Have Outgrown Your Equipment
Upgrading gear shouldn’t be driven by marketing cycles, but by a clear-eyed audit of your own performance and needs. For the budget-conscious athlete, knowing when an upgrade will provide a genuine return on investment is key. There are three clear signals that your abilities are now being limited by your entry-level equipment, making an upgrade a sound financial decision.
The first sign is a performance plateau. If your training volume and intensity have increased but your performance metrics (like speed, distance, or power output) have stagnated for six months or more, your gear may be the limiting factor. An entry-level bike might be too heavy, or basic running shoes may lack the energy return needed to break through to the next level. The second sign is recurring discomfort or minor injuries. If you consistently experience blisters, chafing, or joint soreness despite proper form, it’s a red flag that your gear’s protective or ergonomic features are insufficient for your current training load.
The third, and most definitive sign, is when you can articulate the specific feature you are missing. You’ve moved beyond wanting a “better bike” to knowing you need a stiffer frame for more efficient power transfer or a helmet with better ventilation for long, hot climbs. This indicates you have enough experience to leverage the benefits of a technical upgrade. As experts at Thunder Runners UK state, “Mid-level gear will suit most amateur athletes just fine. The difference only starts to matter at high-elite or professional levels.” The goal is to upgrade to that effective mid-range, not chase professional-grade equipment unnecessarily.
Why the $500 Difference in Bikes Only Saves 2 Seconds?
In no sport is the law of diminishing returns more apparent than in cycling. The market is flooded with ultra-high-end equipment, with some professional racing bikes costing upwards of $12,500 before any upgrades. For an amateur athlete, it’s easy to assume that more money equals more speed. However, the gains become exponentially smaller as the price increases. The $500 jump from an entry-level to a mid-range bike might yield significant improvements in weight, component quality, and ride feel. The next $500 jump, however, might only save a handful of seconds over a 40km time trial—a margin that is irrelevant for anyone not competing at an elite level.
A true financial audit of a bike purchase must go beyond the initial price and factor in the 3-year TCO. Cheaper bikes often come with lower-quality components that wear out faster and require more frequent, and costly, maintenance. They also have a lower resale value, leading to greater depreciation. A mid-range bike, while costing more upfront, often features more durable components and retains its value better, resulting in a surprisingly lower annual cost.
This analysis from the Notts Senior League on bike ownership clearly illustrates the point. The mid-range bike, despite a $500 higher initial cost, ends up being cheaper on a per-year basis due to lower maintenance needs and higher resale value.
| Bike Category | Initial Cost | Maintenance (3 years) | Resale Value | TCO per Year |
|---|---|---|---|---|
| Entry-Level | $1,500 | $600 | $400 | $567 |
| Mid-Range | $2,000 | $300 | $800 | $500 |
The smart investment for an amateur is not the cheapest bike, nor the most expensive, but the one with the lowest TCO. This is almost always the well-built, mid-range model where performance, durability, and cost find their optimal balance.
MIPS vs. Standard Helmets: Is the Extra Cost Worth the Brain Protection?
When evaluating safety equipment, the TCO framework must expand to include a crucial variable: the cost of failure. For a helmet, failure isn’t a broken strap; it’s a brain injury. This shifts the conversation from a simple cost-benefit analysis to an assessment of risk mitigation. A standard helmet is designed to protect against direct, linear impacts, but most real-world falls involve rotational forces, which are a primary cause of concussions.
This is where technologies like the Multi-directional Impact Protection System (MIPS) come in. MIPS is a low-friction layer inside the helmet that allows the head to move 10-15mm relative to the helmet during an angled impact. This slight movement helps to redirect the harmful rotational forces away from the brain. While adding a MIPS layer typically increases a helmet’s price by $30-$50, this “safety premium” must be weighed against the immense potential cost of a concussion.
From an auditor’s perspective, paying the MIPS premium is one of the most logical and highest-ROI decisions an athlete can make. It’s effectively a one-time insurance payment against a catastrophic event.
Case Study: The Financial ROI of a MIPS Helmet
An analysis of MIPS technology highlights a clear financial benefit. The relatively small $30-$50 premium for a MIPS-equipped helmet represents a tiny fraction of the potential medical costs stemming from a single concussion. These costs can quickly run into thousands of dollars in hospital bills, specialist visits, and lost wages during recovery. Furthermore, all certified helmets, whether MIPS or standard, must be replaced after any significant impact. This means the decision to invest in superior safety technology arises with every new purchase cycle, making the recurring choice to pay the safety premium a critical component of a long-term risk management strategy.
The cost is not just financial. The long-term consequences of even a “mild” concussion can include cognitive issues, mood changes, and an increased risk of future neurological problems. Therefore, the $30 premium isn’t just buying a piece of plastic; it’s buying a quantifiable reduction in risk. In this context, the extra cost is not only worth it—it’s an essential investment in your most valuable asset.
Key Takeaways
- Think TCO, Not Price: The true cost of gear is its initial price plus maintenance, minus resale value, divided by its functional lifespan.
- Identify Performance Decay: Recognize that gear like shoes and waterproof jackets loses its key function long before it looks worn out. Replacing it based on performance, not appearance, is safer and more cost-effective.
- Invest in Contact and Safety: Prioritize your budget on items that directly touch your body (shoes, shorts) and protect you from injury (helmets). These offer the highest return on investment for comfort and well-being.
Entry-Level vs. Pro Gear: Where Should Amateurs Spend Their Budget?
After auditing the individual components of your athletic arsenal, the final step is to build a strategic spending plan. For the amateur athlete, the goal is not to buy the most expensive gear, but to allocate a limited budget to the areas that will yield the greatest return in performance, comfort, and safety. A “Pyramid of Priorities” provides a simple yet powerful framework for these decisions.
At the base of the pyramid is your essential safety equipment. This is non-negotiable. This includes a certified helmet for your sport, reliable brakes on your bike, and any required protective gear. This is where cutting corners represents an unacceptable risk. The middle layer consists of your primary contact points. These are the items that directly interact with your body for prolonged periods: your shoes, cycling shorts or bibs, gloves, and saddle. Investing in quality here pays huge dividends in comfort, preventing chafing and soreness that can cut a session short.
Only at the very top of the pyramid should you consider marginal performance gains. This includes expensive, aerodynamic upgrades like carbon fiber frames, deep-section wheels, or ultra-lightweight components. As a comprehensive analysis by the Notts Senior League Sports Analysis points out, this is where the law of diminishing returns is most severe.
The jump from entry-level to mid-range yields 80% of total available benefits, while mid-range to pro only yields an additional 10-15% for much higher cost.
– Notts Senior League Sports Analysis
For the amateur, the sweet spot is investing heavily in the base and middle of the pyramid. A comfortable, safe athlete with mid-range gear will always outperform and out-enjoy an uncomfortable athlete on a pro-level machine. The savviest financial move is to max out comfort and safety before ever spending a dollar on marginal aerodynamic gains.
By adopting an auditor’s mindset and focusing on Total Cost of Ownership rather than the initial price, you can build a collection of gear that not only enhances your performance but also proves to be the most financially sound investment over the long term.