
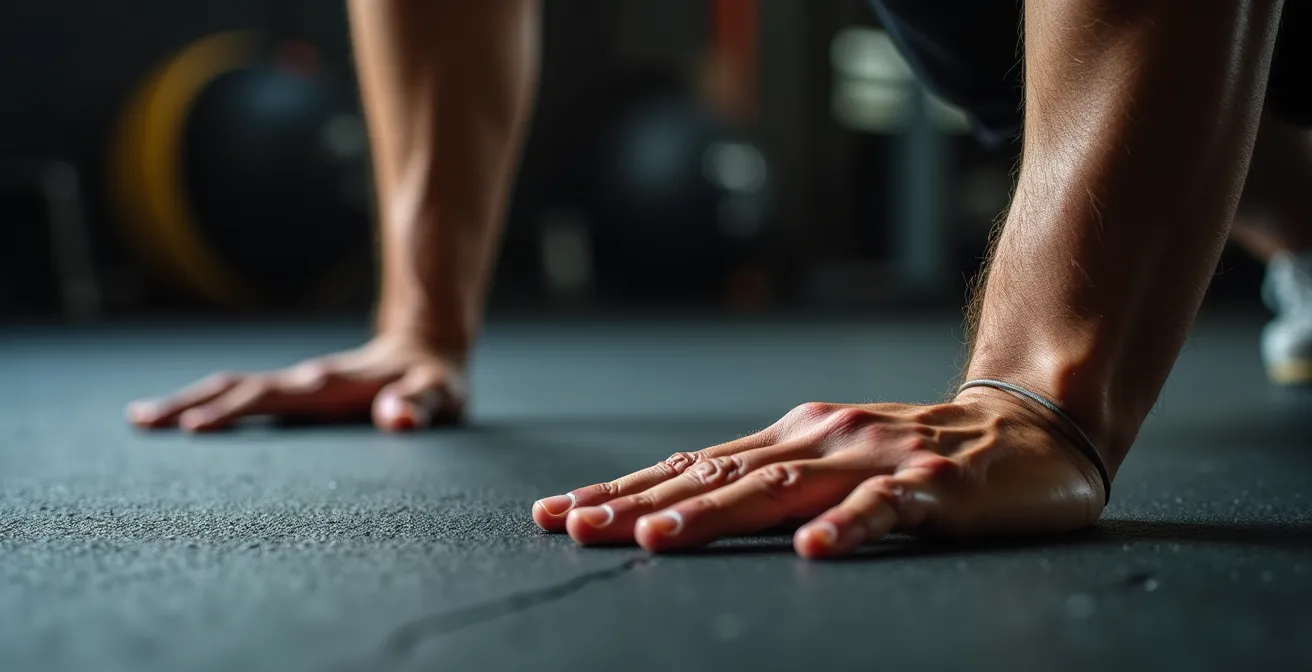
The long-hold plank you’re doing is likely reinforcing bad patterns and hurting your back, not helping it.
- True core stability comes from maximal, short-duration tension in the deep core muscles, not from simply enduring for minutes on end.
- Common form mistakes, like a sagging lower back, turn the plank into a spinal stressor instead of a core strengthener.
Recommendation: Swap your 5-minute marathon planks for 30-second, high-intensity techniques like the RKC plank to re-educate your muscles and build a genuinely resilient spine.
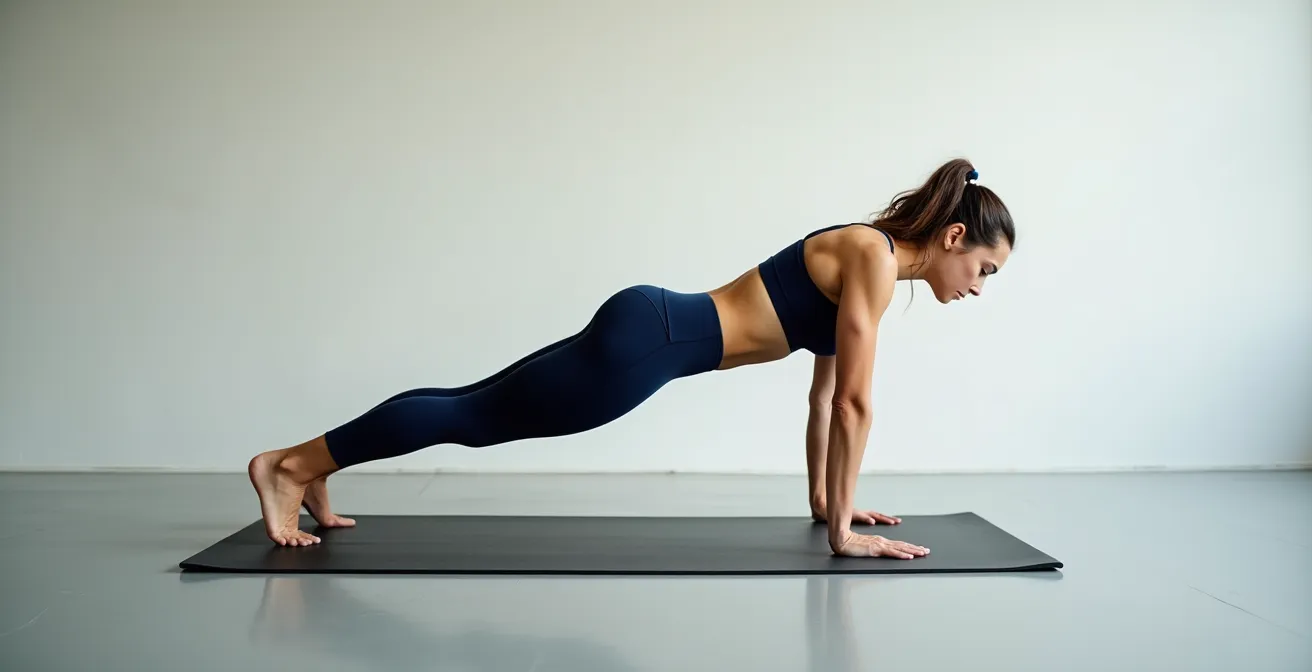
You’ve been diligent. You hold your plank for one, three, maybe even five minutes, chasing that burn, believing it’s the gold standard for a strong core and a healthy back. Yet, that nagging lower back pain persists, or perhaps it even gets worse after your workout. This frustrating paradox is common, and it stems from a fundamental misunderstanding of what a plank is supposed to achieve. The fitness world’s obsession with duration has turned a powerful stability exercise into a feat of pure endurance, often at the expense of proper form and true muscular engagement.
The conventional wisdom—”just hold it as long as you can”—is not only ineffective but potentially harmful. When your deep core muscles fatigue, larger, more dominant muscles in your lower back and hips take over. This is a pattern of spinal compensation that the plank should be correcting, not encouraging. The goal isn’t to teach your body to survive in a poor position; it’s to teach it how to create and maintain a perfect one.
But what if the key wasn’t holding longer, but holding *harder*? What if 30 seconds of maximal effort could deliver more benefit than five minutes of sagging hips and a strained lumbar spine? This guide will deconstruct the myth of the long-hold plank. We will explore the science of deep core activation, introduce superior techniques that prioritize tension over time, and provide a clear roadmap to building a core that truly protects your spine, both in the gym and in daily life. It’s time to stop just enduring your plank and start engineering it for results.
This article breaks down exactly why your current approach might be failing and what precise, expert-backed methods you should adopt instead. Explore the sections below to rebuild your understanding of core training from the ground up.
Summary: Rethinking the Plank for True Back Health
- Why Transverse Abdominis Activation Matters More Than Holding Time?
- How to Use the ‘RKC Plank’ Technique to Burn Out in 30 Seconds?
- Plank vs. Dead Bug: Which Is Better for Protecting the Spine?
- The Lumbar Arch Mistake That Turns a Plank into a Back Breaker
- Beginning vs. End: When Should You Train Core for Stability Transfer?
- Backbands and Footbraces: How to Lock In for Core Transfer?
- Standing Desk vs. Swiss Ball Chair: Which Is Better for Core Engagement?
- Strengthening Stabilizers: The Secret to Avoiding Falls After 60
Why Transverse Abdominis Activation Matters More Than Holding Time?
Most people think of “abs” as the rectus abdominis—the six-pack muscle. But for spinal health, this muscle is far less important than its deeper counterpart: the transverse abdominis (TVA). Think of the TVA as your body’s natural corset. It wraps around your midsection, and when it contracts, it increases intra-abdominal pressure, creating a rigid cylinder that stabilizes your lumbar spine from the inside out. Holding a plank for minutes without consciously engaging this muscle is like trying to support a building with its facade instead of its internal framework.
The problem is that endurance doesn’t equal activation. You can hold a passive plank for a long time by letting your skeleton and lower back ligaments bear the load. True stability, however, is an active, neurological skill. It’s about teaching your brain to fire the right muscle at the right time. This is less about raw strength and more about neuromuscular re-education.
This isn’t just theory; it’s backed by science. Research from Illinois State University specifically looked at this phenomenon. An Illinois State University study showed that individuals with back pain exhibit delayed TVA activation. After a four-week core stability program focused on re-learning this motor pattern, the exercise group showed a significant improvement in their muscle timing. This proves the goal is to improve the *quality and timing* of the contraction, a skill that is learned through focused, mindful practice, not mindless endurance holds.
Here’s how you can start to feel and activate your TVA:
- Lie on your back with your knees bent and feet flat on the floor.
- Place your fingertips just inside your front hip bones.
- Gently draw your lower stomach muscles down and in, away from your fingers. Imagine you are lightly zipping up a tight pair of pants.
- Maintain this contraction while breathing normally. You should not be holding your breath, and the muscles under your fingers should feel firm, but your upper abs and back should remain relaxed. Hold for 5-10 seconds to build the connection.
How to Use the ‘RKC Plank’ Technique to Burn Out in 30 Seconds?
Now that you understand the importance of the TVA, it’s time to apply that principle with a superior technique: the Russian Kettlebell Challenge (RKC) Plank. Forget holding for minutes. The goal of the RKC plank is to generate such immense, full-body tension that holding it for more than 30 seconds becomes nearly impossible. This is the essence of prioritizing tension over time. It transforms the plank from a passive hold into an active, strength-building exercise.
This high-tension approach is far more effective and safer for your spine. As Eric L’Italien, a physical therapist at the Harvard-affiliated Spaulding Rehabilitation Center, notes, the benefits of planking tend to plateau quickly. He states that “two minutes is often considered the maximum, and you don’t get much more benefit after that.” The RKC Plank maximizes those benefits in a fraction of the time.
The technique involves actively contracting every muscle in your body simultaneously. You pull your elbows toward your toes and your toes toward your elbows, creating an isometric contraction that lights up your entire core. Your glutes are squeezed tight, and your quads and lats are fully engaged. This creates a rock-solid pillar of stability that makes spinal compensation nearly impossible.
RKC Plank Full-Body Tension Protocol:
- Setup: Position your elbows directly under your shoulders and your feet shoulder-width apart.
- Initial Lift: Tighten your abs and lift your knees from the floor into a bear plank position first.
- Extend: Step back into a full push-up position, ensuring your hips and shoulders remain square to the floor.
- Squeeze and Tilt: Actively squeeze your glutes as hard as possible. This will create a posterior pelvic tilt, flattening your lower back.
- Generate Maximum Tension: Pull your elbows towards your feet and drive your toes toward your head. Squeeze your fists. Brace everything. Hold for only 10-30 seconds.
Plank vs. Dead Bug: Which Is Better for Protecting the Spine?
While a high-tension plank is a powerful tool, it’s not the only one. For those actively experiencing back pain or struggling with plank form, the Dead Bug exercise is often a superior and safer alternative. The fundamental difference lies in the dynamics: the plank is a static hold against gravity, while the Dead Bug is a dynamic, anti-extension exercise performed in a supported position.
The Dead Bug forces your core to stabilize your spine while your limbs are moving. Lying on your back provides constant feedback; if your lower back starts to arch off the floor, you know you’ve lost core engagement. This makes it an excellent tool for neuromuscular re-education. You are actively teaching your body to keep the core locked in while the arms and legs create a destabilizing force. This directly translates to real-world activities like walking, running, and lifting.
This principle of using dynamic movement and feedback to enhance stability is well-supported. For example, a study on 51 adults with low back pain found that TVA activation was significantly greater during exercises on unstable surfaces or those that involved dynamic movement with feedback. Exercises that challenged stability dynamically, like bridging on a sling, prompted a much higher TVA activation ratio than simple, static holds on a stable surface. The Dead Bug operates on the same principle: it forces your core to react and stabilize against the movement of your limbs.
For someone whose default plank pattern involves a sagging back (spinal compensation), continuing to plank just reinforces that dysfunction. The Dead Bug breaks that cycle. It unloads the spine, provides clear feedback on form, and directly trains the core’s primary function: to prevent unwanted movement in the lumbar spine. For spinal protection, the controlled, dynamic challenge of the Dead Bug often wins.
The Lumbar Arch Mistake That Turns a Plank into a Back Breaker
Here is the single most common reason planks cause back pain: the lower back starts to arch or sag. This is the visual cue that your deep core has checked out and your lumbar spine is now bearing the load. It’s a critical form breakdown that negates the entire purpose of the exercise.
As the experts at The Wellness Team Physiotherapy explain, this is a clear sign of weakness. They state that “if your lower back starts to hurt when planking, most likely it is compensating for a weak core.” When this happens, it’s not your abdominals doing the work; it’s the small, delicate facet joints of your spine being compressed, which is a direct route to pain and injury.
The antidote to this arch is the posterior pelvic tilt (PPT). This is the subtle but powerful action of tucking your tailbone under, which is achieved by forcefully squeezing your glutes. A strong glute contraction rotates the pelvis backward, flattening the natural curve in the lower back and forcing the abdominal muscles to engage to hold that position. You cannot perform a truly effective, back-safe plank without a powerful glute squeeze.
If you find your back arching within seconds of starting a plank, your endurance in that position is zero. You must stop immediately. Holding a bad position longer only strengthens a dysfunctional motor pattern. Instead, you need to regress the exercise to a level where you can maintain a perfect PPT.
Your 5-Point Checklist for a Back-Safe Plank
- Practice the Tilt: Lie on your back and practice flattening your lower back completely to the floor by tilting your pelvis. This is the feeling you need to replicate.
- Engage Glutes First: Before you even lift into the plank, squeeze your glutes as hard as you can. This should be your first cue.
- Tuck Actively: Throughout the hold, consciously think about tucking your tailbone under. It’s an active, not a passive, position.
- Recognize Failure: The moment you feel the arch returning or your glutes can no longer stay squeezed, your set is over. Drop to your knees immediately.
- Build on Success: Build your endurance in a modified position (e.g., on your knees) with perfect form before attempting to progress to a full plank again.
Beginning vs. End: When Should You Train Core for Stability Transfer?
The question of *when* to train your core is just as important as *how*. The answer depends entirely on your goal. Are you training for a six-pack, or are you training for a stable, injury-proof spine that supports you through heavy lifts and daily life? If your goal is the latter, then core work should come at the beginning of your workout, not the end.
Think of it as priming the system. Performing low-intensity activation drills like Dead Bugs or Bird-Dogs before you lift weights serves as a neurological wake-up call. It reminds your brain how to engage the deep core stabilizers and maintain a neutral spine. This “primes” the correct motor patterns so that when you move on to a heavy squat or deadlift, your core is already switched on and ready to provide the stability needed to protect your spine. This concept is known as stability transfer: the ability of your core to function automatically during other complex movements.
Conversely, if you exhaust your core at the end of a workout with high-rep crunches and leg raises, you’ve missed the opportunity for this transfer. You performed your main lifts with a “sleepy” core, potentially using suboptimal form, and then fatigued the very muscles you needed for support. Training core for aesthetics at the end is fine, but training for function and spinal health should be a priority at the start.
A smart protocol might look like this:
- For Stability Goals (Beginning): Start your workout with 2 sets of 10 reps of Dead Bugs or Bird-Dogs to activate the system. You could even sprinkle in short, 15-second RKC planks between sets of your main lifts to keep the core firing.
- For Aesthetic Goals (End): If your primary goal is muscle hypertrophy (a “six-pack”), you can save more intense, high-volume core work for the end of your session after your heavy lifting is complete.
- Recovery: Remember that intense core work requires recovery just like any other muscle group. Allow 24-48 hours between strenuous core sessions.
Backbands and Footbraces: How to Lock In for Core Transfer?
To further enhance core activation and perfect your form, you can use simple tools like resistance bands to provide external feedback. This method, known as Reactive Neuromuscular Training (RNT), essentially “feeds the mistake” to teach your body how to correct it. By using a band that tries to pull you into a bad position (like an arched back), you force your core muscles to work harder to resist that pull.
For example, in a Dead Bug, looping a resistance band around your feet adds a significant challenge. As you extend one leg, the band tries to pull your opposite leg along with it and also tries to pull your lower back into an arch. Your core must fire intensely to fight both of these forces, dramatically increasing the activation of the TVA and obliques. You’re not just moving a limb; you’re stabilizing against an active, external force.
This isn’t just a training trick; it’s a scientifically validated principle. Studies on unstable surface training, which works similarly by providing external feedback, consistently show that these methods significantly improve muscle recruitment. The research confirmed that when an exercise provides this kind of perturbation or external feedback, TVA activation measurably increases. It validates the RNT principle: challenging the system with external forces forces a smarter, stronger neuromuscular response.
Here’s a practical way to implement this with the Dead Bug:
Dead Bug with Resistance Band Protocol:
- Setup: Lie on your back and loop a light resistance band around the arches of both feet. Bring your knees up to a 90-degree tabletop position.
- Engage: Press your lower back firmly into the floor, engaging your TVA.
- Extend Slowly: Extend one leg out straight, moving slowly and fighting the band’s resistance.
- Fight the Pull: The band will try to pull your lower back off the floor. Your primary job is to resist this pull, maintaining constant core tension.
- Return and Alternate: Return the leg slowly to the start and then alternate, performing 8-10 deliberate reps per side.
Standing Desk vs. Swiss Ball Chair: Which Is Better for Core Engagement?
The quest for a healthier spine shouldn’t stop when you leave the gym. Given how many hours we spend at a desk, optimizing your workstation for core engagement is crucial. The two most talked-about solutions are standing desks and Swiss ball chairs, but one is a far more effective tool than the other.
The Swiss ball chair was once hailed as a solution for passive core engagement. The idea was that the instability of the ball would force your core to work all day. However, research and practical experience have debunked this. As a study on the topic highlights, “prolonged sitting on an unstable surface leads to muscle fatigue, poor postural habits, and increased spinal compression.” Your core muscles simply can’t maintain an active contraction for hours on end. They fatigue, and you end up slumping into a worse posture than you would in a good ergonomic chair, now with added spinal compression.
A standing desk, particularly when used as part of a “sit-stand-move” protocol, is a much better option. Standing naturally engages more of your postural muscles and reduces the spinal compression associated with prolonged sitting. Crucially, it doesn’t force you into a static position. It enables “movement snacks”—small bouts of movement like calf raises, hip hinges, or simply shifting your weight. This variety is key to avoiding the fatigue and stiffness that comes from any single static posture, whether sitting or standing.
The best approach isn’t to stand all day or sit all day; it’s to vary your position frequently. A recommended cycle is 25 minutes of sitting, 20 minutes of standing, and 5 minutes of walking or stretching. This rotation minimizes fatigue and keeps your muscles and spine healthy.
| Factor | Standing Desk | Swiss Ball Chair | Sit-Stand-Move Protocol |
|---|---|---|---|
| Core Activation | Minimal passive engagement | Initial engagement, then fatigue | Varied throughout day |
| Spinal Compression | Reduced when standing | Can increase over time | Optimally distributed |
| Movement Freedom | Enables movement snacks | Limited to bouncing | Maximum variety |
| Fatigue Risk | Leg/foot fatigue | Core muscle fatigue | Minimized by rotation |
| Recommended Duration | 20-30 min intervals | Not for extended periods | 25 sit/20 stand/5 walk |
Key Takeaways
- Your goal in core training for back health is maximal tension and perfect form, not duration.
- The transverse abdominis (TVA) and glutes are the key muscles for creating true spinal stability.
- Swap long, passive planks for short, high-intensity RKC planks or dynamic exercises like the Dead Bug to re-train your motor patterns safely.
Strengthening Stabilizers: The Secret to Avoiding Falls After 60
As we age, the conversation around core strength evolves from performance and aesthetics to a more fundamental issue: stability and fall prevention. A strong, responsive core is the foundation of balance. The small stabilizing muscles around the spine, hips, and ankles are our first line of defense against a sudden loss of balance. Weakness in this system is a primary contributor to falls in older adults.
While some sources suggest daily planks for fall prevention, our entire discussion highlights a crucial caveat: it must be the *right kind* of core work. A passive, saggy plank won’t improve balance. However, the principles of high tension and active stabilization found in the RKC plank or the dynamic control of the Dead Bug are directly applicable. They train the body to create a rigid, stable center of mass, which is essential for maintaining balance during movement.
However, a complete fall prevention strategy must go beyond the core and include exercises that specifically challenge and train the body’s balance systems. This involves training the “hip strategy” (using the hips to adjust your center of gravity) and the “ankle strategy” (making fine adjustments with your feet and ankles). It also means progressively challenging your proprioception—your sense of where your body is in space.
A safe and effective program for an older adult focuses on gradual progression and building confidence:
- Weeks 1-2: Start with tandem stance holds (one foot directly in front of the other), holding onto a chair for support for 30 seconds.
- Weeks 3-4: Progress to single-leg stands, still using a chair for light support, holding for 10 seconds on each leg.
- Weeks 5-6: Incorporate standing hip hinges to train the hip strategy for balance recovery.
- Weeks 7-8: Challenge your system with eyes-closed balance holds for 5 seconds, ensuring you are near a wall or chair for safety.
- Daily Practice: Simple ankle circles and calf raises are crucial for maintaining ankle mobility and strength.
The key is to gradually remove the need for support as confidence and stability build. This creates a resilient system that can react quickly to prevent a fall.
By shifting your focus from endurance to tension, from passive holding to active stabilization, you can transform your core training from a source of frustration and pain into a powerful tool for building a truly strong, resilient, and pain-free back for years to come.